Image used with permission by copyright holder
Watermarks are useful visuals for indicating that your document is confidential, private, or not to be copied. These images, usually text or a logo, appear in the background of your document in a faded manner. This allows your audience to read the document without distraction while still conveying the message of your watermark.
If you are using Microsoft Word, adding a watermark to your documents is simple. Here’s how:
Add a quick text watermark in Word
You can easily add a watermark to your Word document before, during, or after its creation. Additionally, there are predefined text watermarks that you can apply with a single click.
Step 1: Open your Word document and go to the Design tab.
Step 2: Click on the Watermark drop-down arrow in the Page background section of the ribbon.
Step 3: Choose the desired watermark from categories like Confidential, Disclaimers, and Urgent, each offering different font styles and placements for the watermark.
The selected watermark will now appear on each page of your Word document.

Image used with permission by copyright holder
Add a custom text watermark
If you prefer a custom text watermark, follow these steps to create one with your preferred text, font, color, and placement:
Step 1: Navigate to the Design tab, click on the Watermark drop-down arrow, and select Custom watermark.
Step 2: Choose the Text watermark option.
Step 3: Customize the text using the provided options for language, text, font, size, color, and layout.
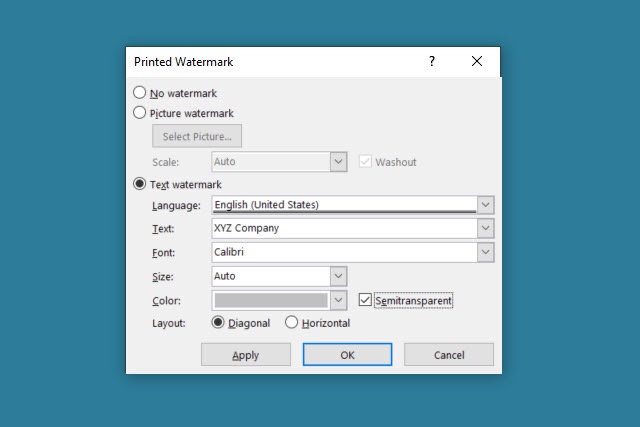
Image used with permission by copyright holder
Step 4: Once you have customized the text, click on Apply or OK to use the watermark in your document and then click Close to close the window.

Image used with permission by copyright holder
Add a custom image watermark
If you prefer using an image as a watermark, you can create a custom image watermark in Word with a picture of your choice. Follow these steps:
Step 1: Access the Design tab, click on the Watermark drop-down arrow, and select Custom watermark.
Step 2: Choose the Picture watermark option.
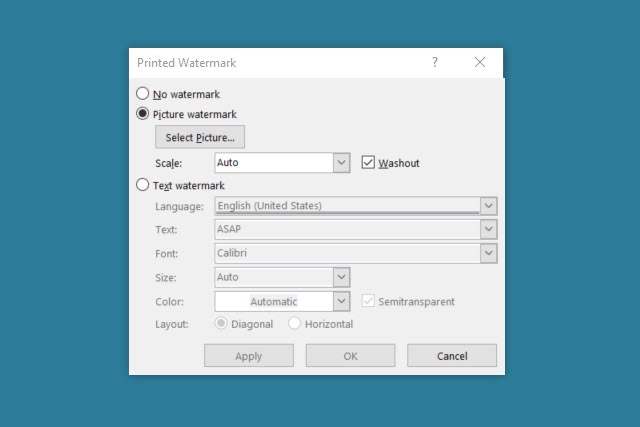
Image used with permission by copyright holder
Step 3: Use the Select picture button to insert your desired image from your computer, Bing image search, or OneDrive.

Image used with permission by copyright holder
Step 4: Adjust the image scale and opacity as desired.
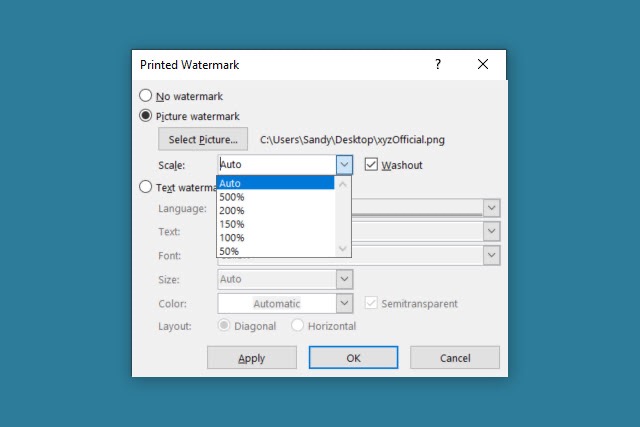
Image used with permission by copyright holder
Step 5: Apply the changes and close the window to use the custom image watermark in your document.
If you found creating a watermark in Word to be straightforward, consider applying a watermark to protect your photos as well.

Image used with permission by copyright holder
Remove a watermark in Word
If you decide to remove a watermark from your document, follow these simple steps:
Step 1: Go to the Design tab.
Step 2: Click on the Watermark drop-down arrow.
Step 3: Select Remove watermark from the options.

Image used with permission by copyright holder
By using subtle and faded background images or text as watermarks, you can effectively convey the confidentiality, urgency, or draft status of your document without detracting from its content. Remember these steps the next time you need to add a watermark in Word, and consider inserting a signature or converting the document to a PDF if necessary.