If you’re new to using a Mac, you’re likely still getting the hang of it. macOS is intuitive and easy to understand, so mastering your new Mac should be a breeze.
Before diving into exploring your Mac, it’s a good idea to enable some features. One such feature is Siri, Apple’s virtual assistant.
Apple’s recent macOS update, Sequoia, introduced Apple Intelligence to M-series Macs, enhancing Siri’s capabilities. Enabling Siri and Apple Intelligence on your Mac is a simple process that can enhance your overall experience. Here’s a guide on how to do it.
How to Turn on Siri and Apple Intelligence on Your Mac
To start using Siri and Apple Intelligence on your Mac, you need to enable them. Follow these steps to check if they’re enabled and turn them on if necessary:
- Click the Apple menu (the Apple logo icon) in the top left corner of your screen.
- Go to System Settings.
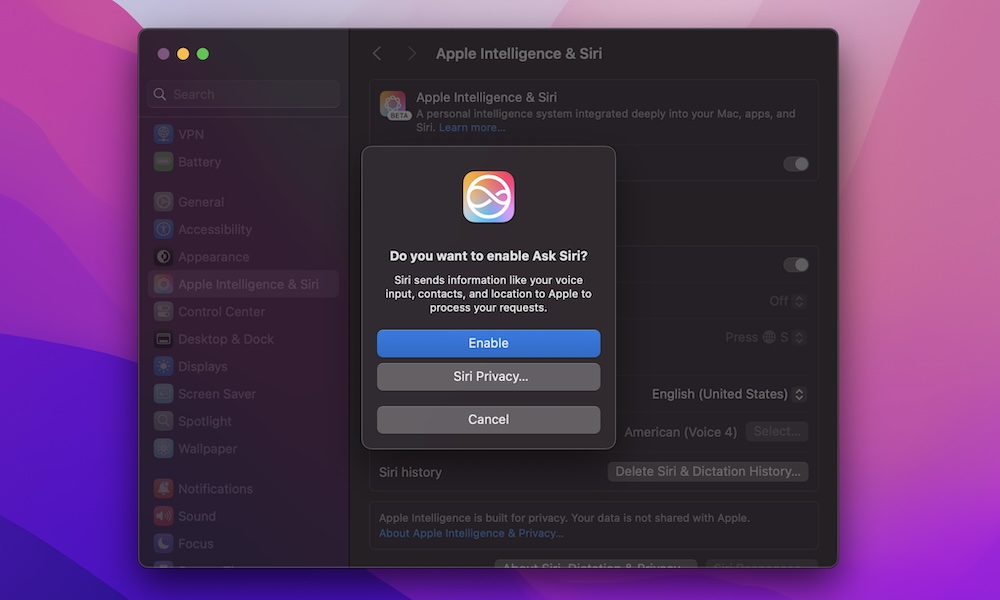
- On the left sidebar, click on Apple Intelligence & Siri.
- Turn on Apple Intelligence at the top of the window.
- Under Siri Requests, turn on Siri.
Once you’ve completed these steps, you’re almost ready to start using Siri on your Mac.
How to Trigger Siri With Your Voice
In addition to enabling Siri on your Mac, you can set it up to respond to voice commands like “Hey Siri.” Here’s how to do it:
- Click the Apple menu in the top left corner of your screen.
- Go to System Settings.
- On the left sidebar, click on Apple Intelligence & Siri.
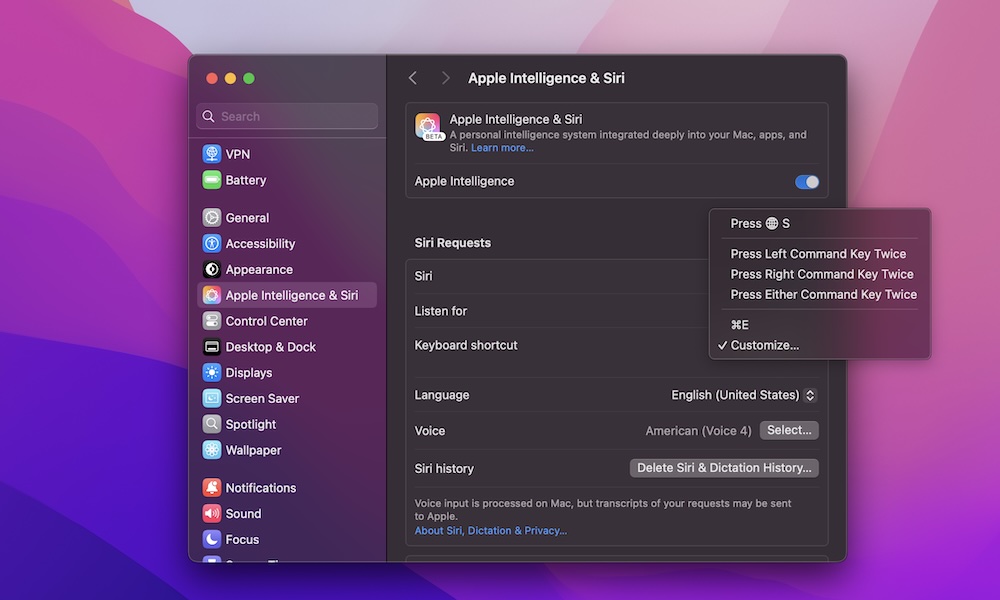
- Under Siri Requests, click Off next to Listen for to reveal the drop-down menu.
- Select “Siri” or “Hey Siri.”
- Click Continue in the new window that popped up and follow the on-screen instructions.
Once set up, you can call out “Hey Siri” to activate the virtual assistant and make requests using Apple Intelligence.
Create a Keyboard Shortcut to Type to Siri
You can also trigger Siri using a keyboard shortcut, allowing you to type requests instead of speaking them aloud. Here’s how to set it up:
- Click the Apple menu in the top left corner of your screen.
- Go to System Settings.
- On the left sidebar, click on Apple Intelligence & Siri.
- Under Siri Requests, click Press next to Keyboard shortcut.
- Choose the default keyboard shortcut or select Customize to create your own unique shortcut.
- Enter the shortcut you want to use, ensuring it’s not already in use on your Mac.
Once configured, you can use the keyboard shortcut to interact with Siri by typing or speaking your requests.
How to Use ChatGPT on Your Mac

If Siri’s capabilities are limited, you can leverage ChatGPT, an extension available with Apple Intelligence and Siri. Here’s how to use ChatGPT on your Mac:
- Click the Apple menu in the top left corner of your screen.
- Go to System Settings.
- On the left sidebar, click on Apple Intelligence & Siri.
- Scroll down to the bottom of the right side menu and click on Extensions, then select ChatGPT.
- Turn on Use ChatGPT.
- If desired, sign in to use your ChatGPT account or subscribe to ChatGPT Plus for additional features.
- You can also disable Confirm ChatGPT Requests to streamline the interaction with ChatGPT.
With ChatGPT enabled, Siri will seamlessly work with ChatGPT to provide answers to your queries. You can even start your request with “Ask ChatGPT to…” for direct engagement with ChatGPT.
Master Siri on Your Mac
Now that you’ve set up Siri and ChatGPT on your Mac, it’s time to put them to the test. Experiment with different requests, from basic tasks to more complex queries, and leverage the power of Apple Intelligence to enhance your Mac experience.
global $wp;
. ‘/’;
?>